
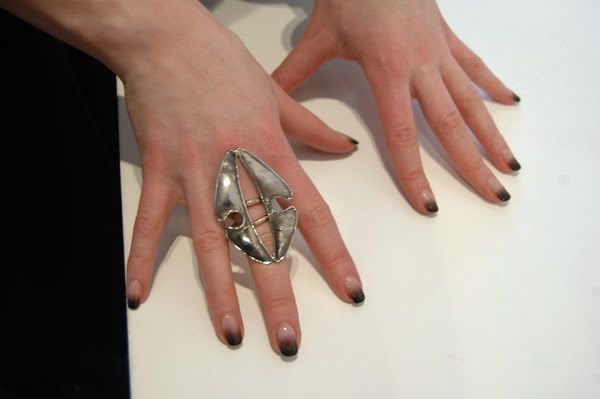
this is where it all began (for me at least...): a picture on nice and shiny.
ombre nails! what a delight!
so many of my regular-read blogs have had a bash at this, but there's no definitive guide to the perfect fade to black.
UNTIL NOW.
lol, j/k. this is at best a rough guide; a diving board, if you will. learn from my mistakes; take it further.....etc.
you will need!:
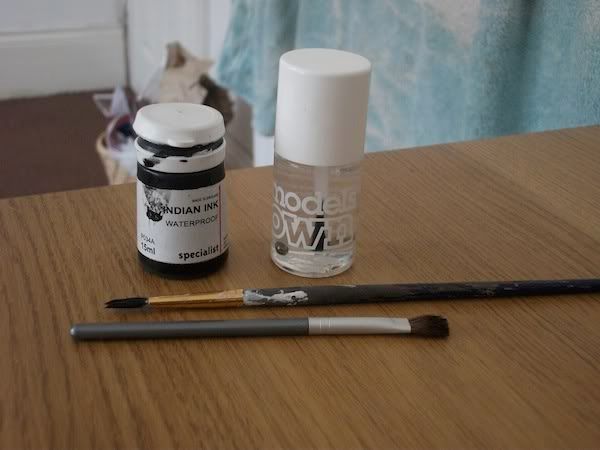

indian ink
clear top coat
a tiny paintbrush
a flat eyeshadow brush (or paintbrush, but the eyeshadow brush tends to have softer bristles!)
-------------
indian ink is a great choice for a number of reasons: it dries quickly, it washes off your fingers (so once your top coat is dry, a quick rinse under the tap will get rid of the excess), it's cheap (my tub reliably informs me it cost 1.60), and it's the only black ink i had lying around.
i also have a green drawing ink which i might have a bash with sometime later this week...
course, all that means that it does chip easily. swings and roundabouts.
the flat eyeshadow brush is also recommended - especially if you have one which is about nail-width. easy of application, etc.
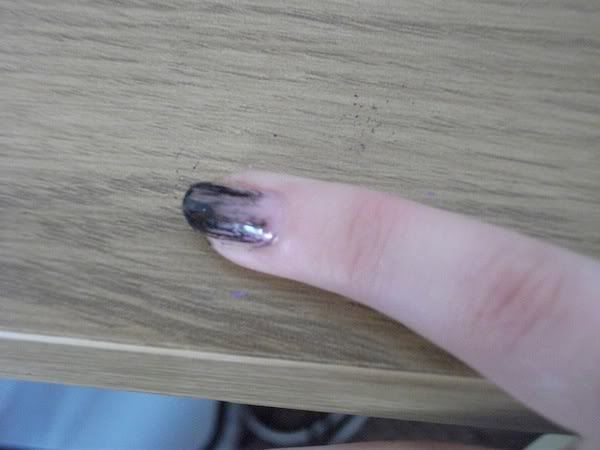
also FYI? ombre nails are messy:
my desk; after attempt no.1
...but again, it washes off easily.
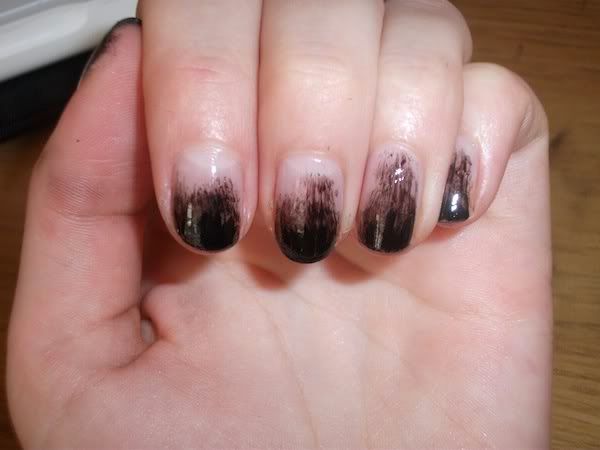
trial the first
(all trials began with a basecoat of the models own base/topcoat all in one...)
trial one involved dabbing a dot of ink onto the end of each nail with the small brush, then using the flat brush to spread that dot across the nail, then waiting for that coat to dry and doing another dot, dragging it a little less far each time, and finishing with a layer of topcoat.
it probably could've done with another topcoat layer, as it swiftly started to chip. sigh.
also, i managed to wipe a big smudge in one of my little fingers.
trial the second
day two saw me begin another attempt, which involved essentially the same process, but with a layer of topcoat between each layer of ink.
i hoped it would make it more chip resistant....
it did not.
trial the third
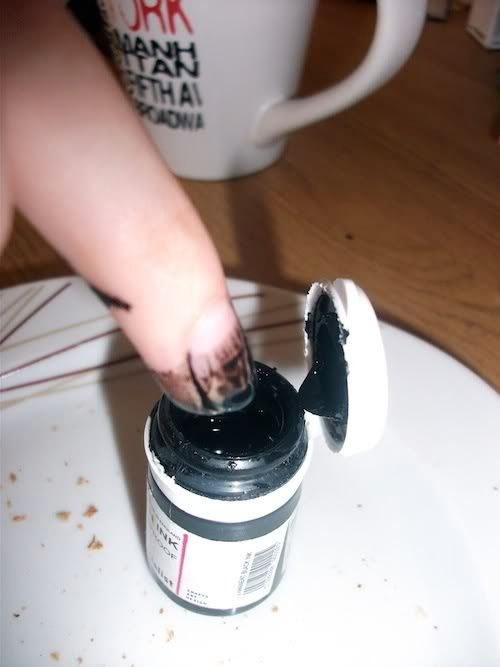
utilising what i knew of indian ink, i thought it a stroke of genius to do this:
note toast plate (to catch drips) and coffee mug (full of coffee. and now, ink stains.).
pros? good coverage.
cons? not much of a fade; mess EVERYWHERE; took ages to dry; there is now a black streak floating around my topcoat bottle; and my thumbs wouldn't fit into the bottle.
massive. fail.
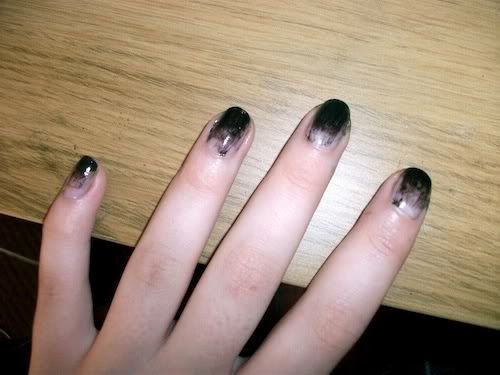
though they look kinda cool. (this is after topcoating and washing the major amounts of excess off...)
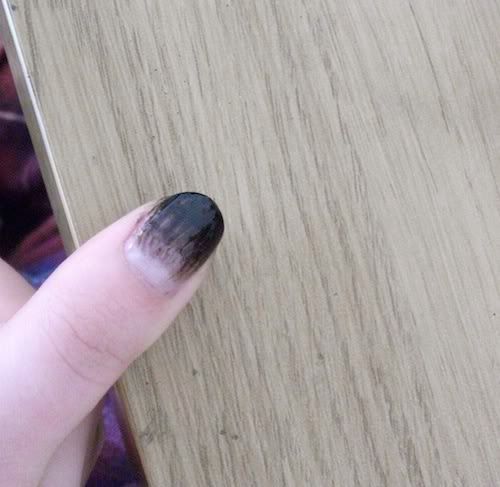
trial the fourth
the absolute last one before i get annoyed.
i did, after all, have two thumbs to paint:
and the best one yet, imo.
ignored the tiny brush entirely, and painted with the flat brush with as little ink on it as possible. slowly added layers, with plenty of time for them to dry inbetween. two coats of topcoat to finish.
i don't know if trials 3 or 4 chipped easily cos i took them off in an ink-fatigue about 20 minutes after i finished them.
if i hadn't been so annoyed at ink in general by this point, i might've repainted all my nails like this one, but instead i pulled out my Models Own Purple Grey, which is fantastic and easy and lovely.
perhaps in a couple of days i'll try method 4 for my entire hands, or the same method with the green ink. though knowing my messy nature, the green ink will stain my hands for longer than it will my nails.


No comments:
Post a Comment